


X-BOND SATIN STONE
SEMCO’s most innovative custom engineered product is X-Bond Seamless Stone, which is the core element in both the SEMCO Remodel without Removal™ and SEMCO’s ADA Safety Floor systems. It creates chemical bond at the molecular level to any solid surface. X-Bond Seamless Stone is a zero VOC hybrid of natural stone and advanced cross-linking technology. Perfect for floors, walls, pool decks and waterproofing.
FEATURES/BENEFITS
- Flexible waterproof membrane
- Flexible waterproof membrane
- Breathable and chemical resistant
- Minimizes remodeling waste disposal
- Interior, exterior, and below grade application
- Can be safely used in confined areas
- UV and freeze-thaw damage resistant
SUBSTRATES
- Concrete surfaces
- Coated surfaces
- Ceramic tile
- Wood surfaces/decks
- Vinyl/VCT surfaces
- Natural stone
- Metal, glass and plexiglass
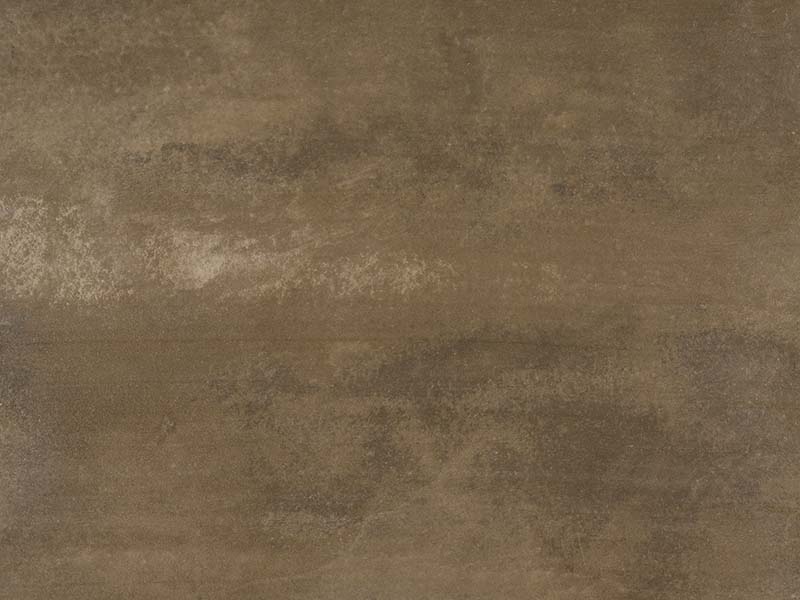
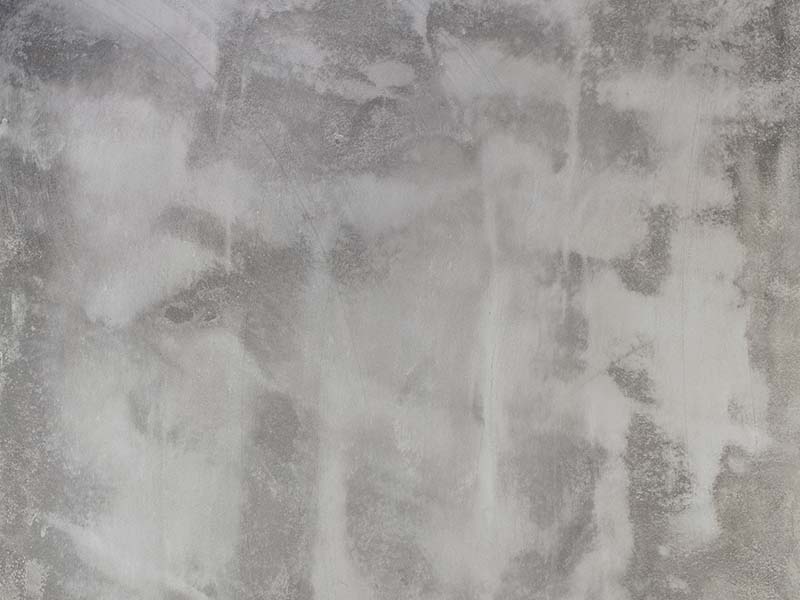
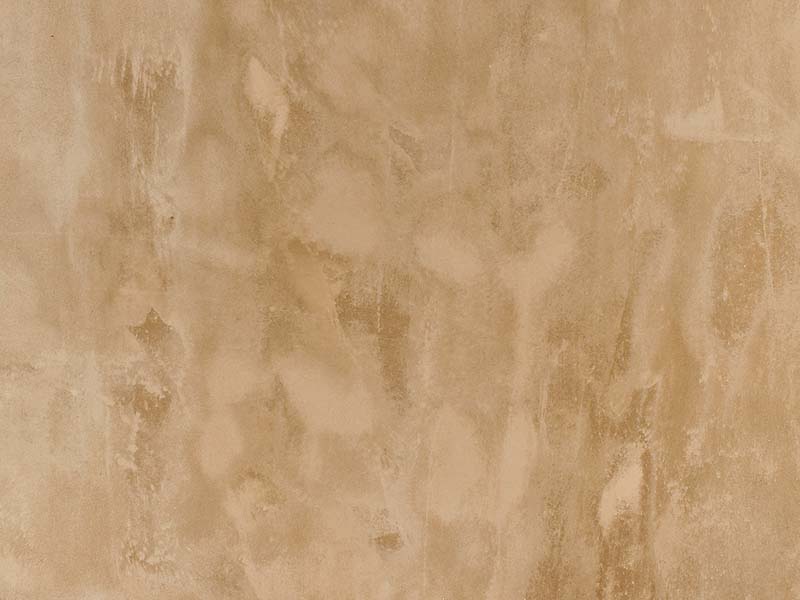
AVAILABLE COLORS
Polished Bond
The SEMCO Polished Bond Finish uses the SEMCO Color Bond to create rich and vivid finishes. It is designed to create multiple color variations within itself. Suitable for floors and walls. Great for commercial and residential applications.
SPECIFICATIONS
| Existing concrete | 60-75 |
| Painted surface | 60-75 |
| Ceramic tile | 55-75 |
| Vinyl tile | 60-75 |
| Natural stone | 50-100 |
| Metal | 60-75 |
COVERAGE
(sq. ft. per 2 gallons of X-Bond Liquid and 1 50 lb bag of X-Bond Stone, coverage is based on 1/8” application)
| Drying time | 8 hours |
| Cure time | 24 hours |
| Color | White powder and white liquid |
| Chemical type | Polymer modified stone |
| Clean up | Water |
| Shelf life | 1 year in unopened containers |
| Packaging (X-Bond Liquid and X-Bond Stone) | 1 gal. pail, 5 gal. pail, 55 gal. drum / 50 lb bag |
APPLICATION PROCEDURES
Preparation
Cleaning existing substrate
- Sweep debris off surface
- Dampen surface with water
- Apply Power Cleaner solution 1 lightly with pump sprayer and allow to sit for 2-3 minutes
- …
- …
Masking
- Use masking paper to cover area 1/2” above surface
- Use brown tape 1/8“ above surface
- For painted walls, use blue masking tape
Cracks and Control Joints
- Open the cracks and control joints that exceed 1/8” with a diamond angle grinder. Use a dust collector to remove debris
- Open cracks over 1/8” and all control joints with 4” diamond angle grinder. Use vacuum to immediately remove debris while grinding
X-Bond Seamless Stone – Polished Bond
Scratch Coat
- Roll X-Bond Liquid as primer coat. Do not allow to dry
- Mix X-Bond mixture 1 part X-Bond Liquid to 2 parts of X-Bond Stone, in this order, and mix with square mixing paddle at low speed (180-200 RPM)
- While the X-Bond Liquid is still tacky, pour the mixture to the far edge of surface
- Using concrete broom spread material tightly, in ONE DIRECTION
- Allow surface to dry. Scrape surface of any loose particles, and sweep clean
Cracks and Control Joints
- Roll X-Bond Liquid as primer coat. Do not allow to dry.
- Mix X-Bond mixture 1 part X-Bond Liquid to 2 1/2 parts of X-Bond Stone and pour onto scratch coat. While still wet press the anti-fracture membrane into the X-Bond Surface and use 18” smoother or trowel to spread the anti-fracture membrane. Re-prime surface on top of anti-fracture membrane with X-Bond liquid. While surface is tacky spread X-Bond mixture, as above, evenly
- When applying the next line of anti-fracture membrane overlap the new sheet over the existing sheet a minimum of 2”
- Allow surface to dry and proceed X-Bond finish
Brown Coat
- Apply Primer Coat of X-Bond Liquid. Do not allow to dry
- Mix X-Bond mixture 1 part X-Bond Liquid, 1 part X-Bond Additive, mix this first. Then add 2 1/2 parts X-Bond Stone, mix with Square Mixing Paddle at low speed (180-200 RPM)
- While the X-Bond Liquid is still tacky, pour the mixture to the far edge of surface
- Using a Gauge Rake spread the Brown Coat evenly to the desired thickness. Use a X-Bond smoother to even the surface. Spike shoes are recommended for walking on X-Bond surface
- Remove tape before the surface is completely dry. Use red tape to mask off the bottom of shoe treads to walk on surface. Remove the 1” of tape but do not sweep the debris. Then allow surface to totally dry and remove debris from the surface. Detail the edges as required and re-apply the tape before proceeding to next step
- Allow Brown Coat to dry for a minimum of 12 hours (depending on thickness)
X-Bond Seamless Stone – Polished Bond
- Mix X-Bond Color Activator into the X-Bond Liquid
- Roll colored X-Bond Liquid as primer coat. Do not allow to dry
- Mix X-Bond mixture 1 part X-Bond Liquid to 2 1/2 parts of X-Bond Stone, in this order, mix with Square Mixing Paddle at low speed (180-200 RPM)
Finishing
Satin Stone
- Mix 2 parts of Part A and 1 part of Part B (included in your product order) with a low speed mixer and specified low air paddle, stirring thoroughly, avoid mixing more product than can be applied. Product pot life is up to 35 minutes depending on temperature (MARK TIME ON CONTAINER)
- Use airless sprayer with tip size 21 at 850-1,000 PSI
- Position the airless sprayer gun at 18” to 24” away from the floor
- Minimum of 3 coats is required to ensure 1.5 mil film thickness
- Apply at temperatures from 50°F to 90°F
- Allow 48 hours to cure before allowing traffic